
If you’ve spent months foam rolling your quads or icing your knees with no lasting relief, the problem might not be in your knee at all. It could be sitting 12 inches lower. There is a simple diagnostic called the 5 Inch Ankle Test. It takes 30 seconds, requires only a wall, and can tell you immediately if a stiff ankle is quietly forcing your knee to absorb dangerous, compensatory loads.
Below is the clinical breakdown of why this matters, how to test yourself, and the exact protocol to fix it without a gym or a doctor’s appointment.
What Is the 5-Inch Ankle Test?
Weight Bearing Lunge Test
In sports medicine, this is known as the Weight Bearing Lunge Test WBLT. It measures dorsiflexion, the ability of your shin to travel forward over your foot while the heel remains planted. Every functional movement, squatting, running, or walking down stairs, requires the ankle to bend. If the ankle is blocked, the kinetic chain breaks.
The next joint up the knee is forced to pick up the slack. Unlike lying down assessments, the 5 Inch Test evaluates the ankle under load, which is the only position that truly replicates the mechanics of pain. Physio research confirms the test’s high reliability, ICC scores between 0.80 and 0.99.
Crucially, research from the Washington Athletic Club suggests you need at least 10 to 15 degrees of ankle bend for normal daily movement. Most people suffering from chronic knee pain fall significantly short of this baseline.
How to Perform the Test?
To get an accurate reading, follow these steps precisely:
- Barefoot Only: Shoes have heel drops that artificially inflate your range of motion.
- The Set-Up: Assume a half kneeling position facing a wall.
- The Measurement: Place your big toe exactly 5 inches from the wall. If you don’t have a ruler, four fingers laid flat is a standard estimate used by experts like The Prehab Guys.
- The Drive: Keeping your heel glued to the floor, drive your knee straight forward.
- The Result: If your knee touches the wall without the heel lifting, you pass. If the heel pops up or the knee stops short, you fail.
The Scoring Key:
- 5+ Inches: Optimal mobility.
- 3–4 Inches: Restricted; likely causing minor compensations.
- Under 3 Inches: Severely restricted; a primary driver of joint stress.
- Asymmetry: A significant difference between left and right is a major red flag for injury risk.
The Kinetic Chain: Why Stiff Ankles Hurt the Knee?
Think of your lower body as a car’s suspension system. When one shock absorber is in the ankle, it freezes; the energy of impact doesn’t disappear; it is transferred to the next link in the chain.
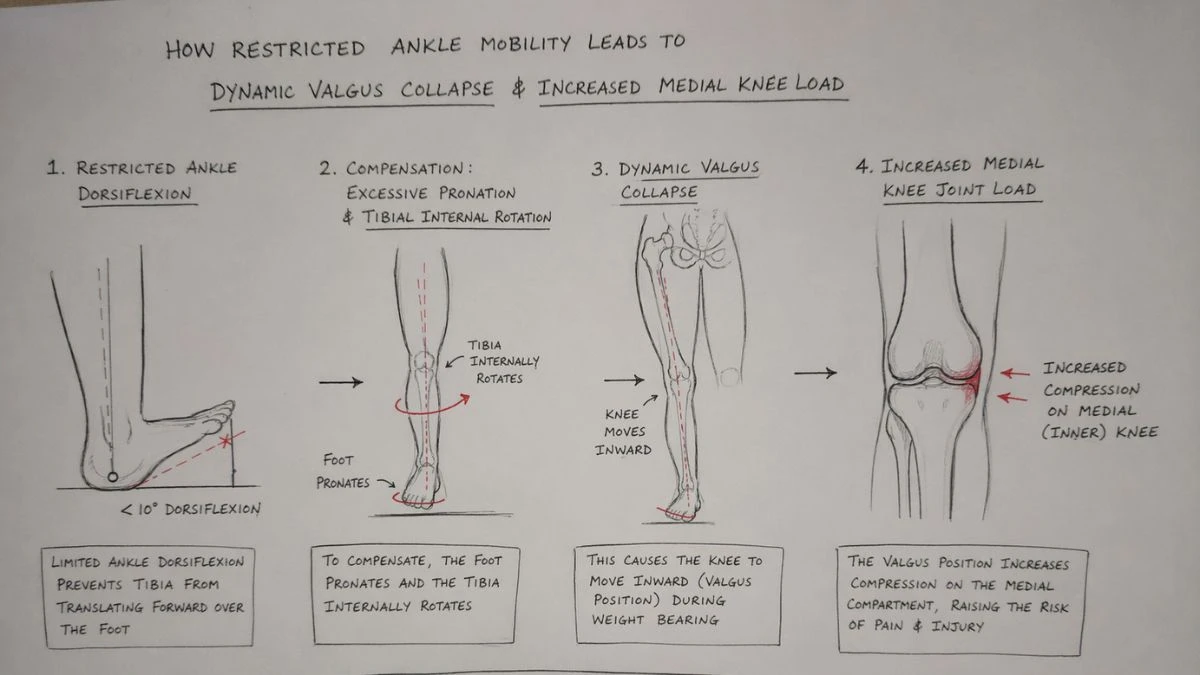
The Dynamic Valgus Collapse
When the ankle fails to bend forward, the body finds a cheat path to clear the gap. It forces the knee to collapse inward, a movement called Dynamic Valgus.
According to the Journal of Orthopaedic & Sports Physical Therapy, this collapse increases joint loads by 20% to 40%. In plain terms: because your ankle won’t bend, your knee twists. This mechanical error happens thousands of times a day, leading to:
- Patellofemoral Pain (Runner’s Knee): Controls average 33 degrees of mobility, while sufferers average only 30. That tiny 3 degree deficit is statistically significant.
- IT Band Syndrome: The inward rotation of the knee pulls the IT band tight, creating friction on the outer knee.
- ACL Risks: Oklahoma State University research shows restricted ankles lead to higher internal knee rotation, a known mechanism for ligament tears.
The 6-Step Fix Protocol
If you failed the test, the following protocol follows a specific order: Release, Mobilize, Stretch, and Strengthen. Perform this daily for 5 to 10 minutes to see results within two weeks.
Step 1: Soft Tissue Release (The Reset)
Before stretching, you must loosen the knots. Use a foam roller or massage ball on your calves.
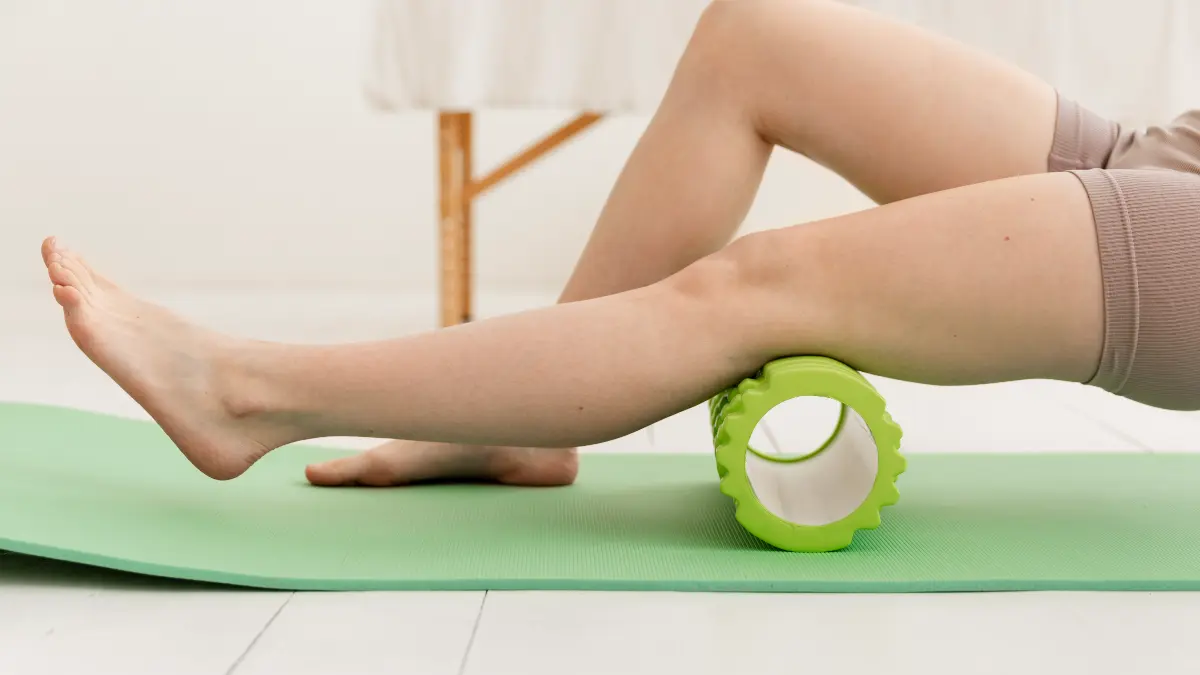
- Upper Calf: Straight leg.
- Lower Calf (Soleus): Bend the knee while rolling to target the deeper tissue.
- Why: Stretching cold, tight tissue is inefficient. Release the tension first.
Step 2: Knee-to-Wall Mobilizations
Use the test as the exercise. Stand at your fail distance and perform 10 to 15 slow, controlled repetitions, driving the knee toward the wall and back. Do 3 sets per leg. Speed is the enemy here; slow, loaded end range movement is what signals the brain to allow more range.
Step 3: Soleus-Targeted Wall Stretch
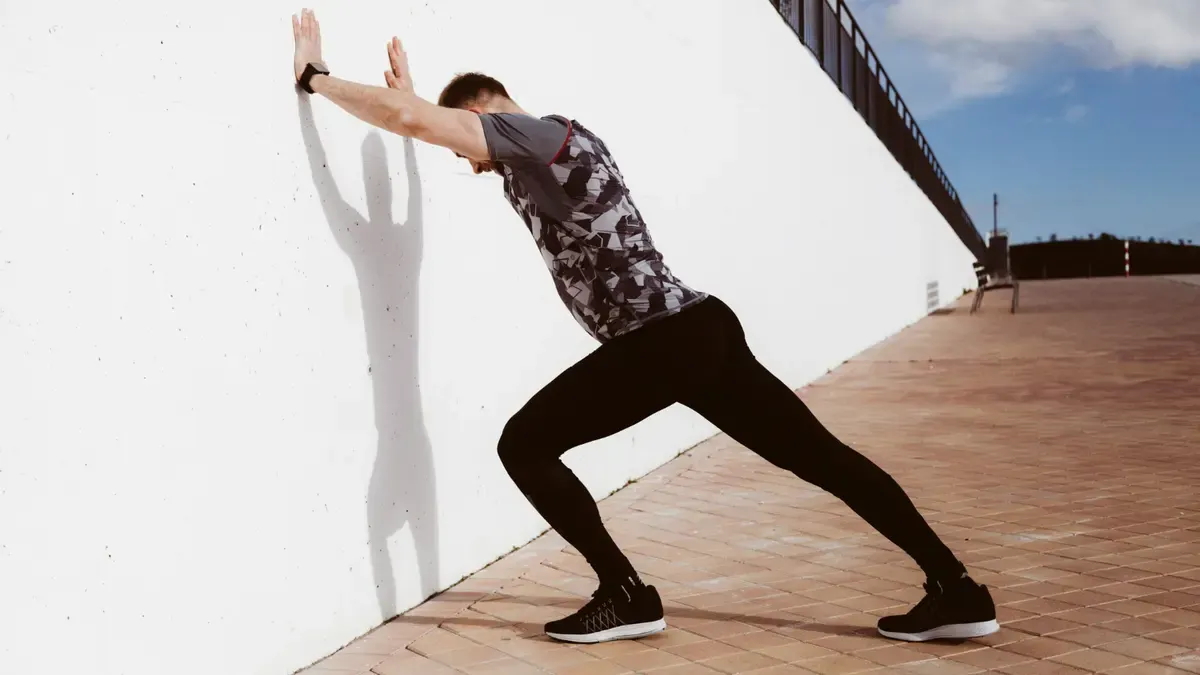
Most people only stretch the gastrocnemius, the large upper calf muscle, with a straight leg. However, the soleus is the muscle most responsible for limiting functional movement.
- The Move: Face the wall in a lunge. Bend both knees and drive the front knee forward while keeping the heel down.
- Hold: 45 60 seconds. You should feel the stretch lower down, near the Achilles.
Step 4: Band-Assisted Mobilization (For Joint “Pinch”)
If you feel a pinch at the front of your ankle rather than a stretch at the back, your joint capsule is restricted.
- The Move: Anchor a resistance band low to a heavy object. Loop it over the talus, the very front of the ankle joint. Step forward into a lunge so the band pulls the joint backward.
- Action: Perform 20 knee drives. The band helps the bones glide correctly as the ankle bends.
Step 5: Weighted Mobilization (Advanced)
Once the basic lunge feels easy, add a light weight like a kettlebell or heavy book onto the top of your knee during the Knee to Wall drill. This added load provides a passive force that pushes the shin further into the joint range.
Step 6: Eccentric Calf Raises (The Lock-In)
Flexibility without strength is temporary. To make your mobility gains permanent, you must strengthen the muscle in its lengthened state.
- The Move: Stand on the edge of a step. Rise on two feet, then switch to one foot.
- The Secret: Lower your heel below the step level very slowly, 3 5 seconds.
- Dose: 3 sets of 10 reps. This eccentric loading repairs the tendon and maintains the new range of motion.
Conclusion
Your knee pain is a signal, but it isn’t always the source. By spending 60 seconds against a wall, you can stop guessing and start addressing the mechanical truth of your movement. The research is undeniable: a mobile ankle is the best insurance policy for a healthy knee.
Track your 5 inch test results, commit to the protocol for 14 days, and watch how quickly chronic pain disappears when the kinetic chain is finally aligned.
⚠️MEDICAL DISCLAIMER
This article is for informational purposes only. It does not replace medical advice, diagnosis, or treatment. The information covers ankle dorsiflexion, Weight Bearing Lunge Test (WBLT), knee pain mechanics, kinetic chain compensation, Dynamic Valgus, runner’s knee, IT band syndrome, ACL injury risk, soft tissue release, knee-to-wall mobilizations, soleus stretching, band-assisted joint mobilization, and eccentric calf raises. Individual results vary based on age, health status, and fitness level.
Before changing your exercise routine, diet, or supplement use, talk to your doctor or a qualified health professional first. If you experience chest pain, dizziness, severe joint pain, or any sudden symptom during or after exercise, stop immediately and seek medical care.